Tea Bag Folding: Waterbomb variation Fold
-
This is the Waterbomb Variation Fold for tea bag folding:
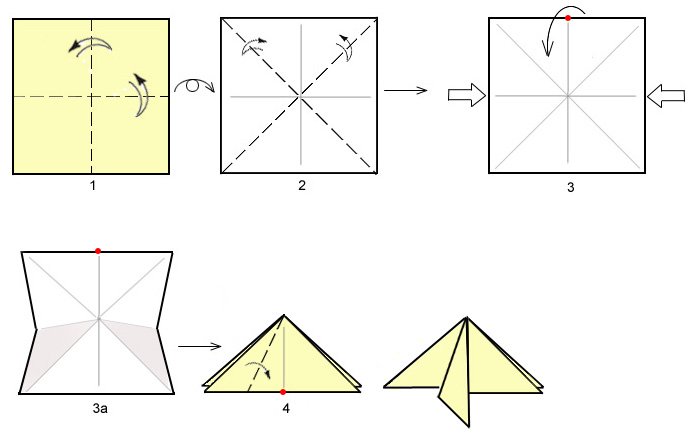
- You will need 8 pieces of square paper. Place the sheet of paper with the color side down. Fold top left corner to bottom right corner. Unfold to get a diagonal crease.
- Fold top right corner to bottom left corner. Unfold to get a X crease.
- Turn the paper over.
- Fold top to bottom. Unfold.
- Fold left to right. Unfold. Push the paper towards one another at the arrows. This will cause the paper to fold along the creases to form a mountain shape.
- This is a classic origami fold called Waterbomb Fold. There are four flaps: two on the left and two on the right.
- On the left side, fold the top flap towards the center crease. This is the Waterbomb Variation Fold. It is basically the waterbomb fold with an extra pointy-tip sticking downwards.
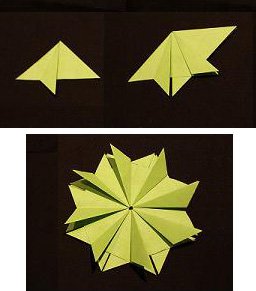
- To make the medallion, place glue on the right-side flaps. Slip another tile between the flaps that have glue. Press down to glue the two tiles together. Continue to glue the remaining tiles in a circle pattern. The pointy-tips should all be visible to give a nice pinwheel design.
Tea bag folding is a fun way to make greeting cards and decorations.


