Money Spider
by Clay Randall

This dollar bill spider is by Clay Randall and used to be found on this web site: http://members.cox.net/crandall11/money/spider/
But this site is no longer active and we have captured the image and reproduce it here. Please contact us if you are the rightful owner of this diagram and wish for it to be removed. Otherwise, thank you for sharing your talent.
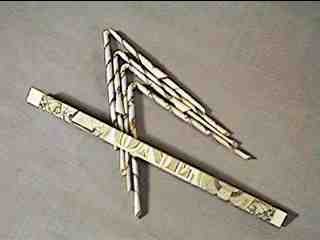
Now you have the pieces.
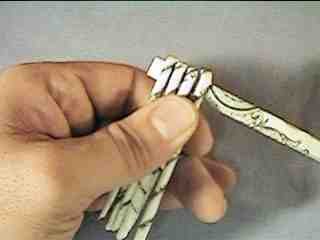

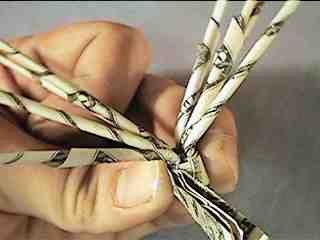
This is a close-up of the four legs draped over the flat folded bill. While holding the leg ends tightly together, tightly wrap the flat bill around the whole thing one and a half times.
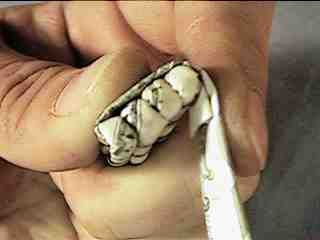
This picture shows the flat bill wrapping over and trapping the end poking out from the left on the picture above. Make sure that this wrap is very tight, that the legs are squeezed tightly together, or you won’t be able to make the body stay together (described later).
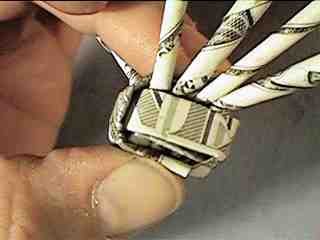
This is a pretty good, tight wrap. If it doesn’t look like this, don’t continue. Work on it until it is solidly tight.
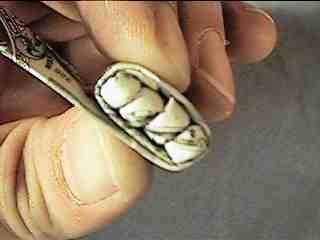
Making sure to hold the wrap tightly closed, turn the whole thing over in your hands. While squeezing the side tightly together, kink each of the legs outward, four on each side.(Try forcing the bend to occur over your thumbnail, to prevent pulling the wrapped bill out of shape, or loosening the wrap.)

Fold a ninety degree turn into the flap over the end, and then fold the remainder down between the split legs. (Just look at the picture.)
After going between the legs (top of this picture), wrap the flap around the other end and around under.
 Okay, this is a rotten picture, but… Take the remainder of the tab (bottom of previous picture, middle-to-right this picture), and tuck it between the legs and the outer wrap on the side that the outer wrap is only one deep.
(I usually use the end of a key to help force this bit down into the body. This has to be tight, or the whole thing will fall apart. If the end is too short, or it won’t stay shoved down in there, you need to go back and tighten up the whole body wrap.)
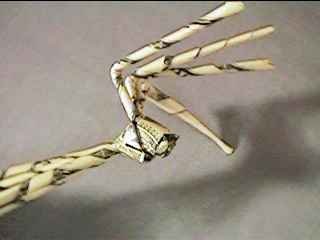
If all has gone well up to now, the body will hold itself together based on the previous step. For each of the eight legs, bend back toward the body.
That’s about it. Here’s the finished product: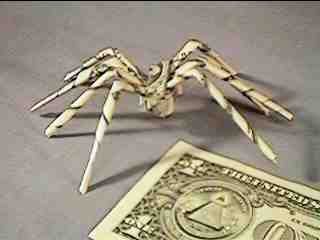
There are two keys to having it look nice and stay together:
- Wrap the tubes for the legs tight
- Wrap and tuck the “body” bill tight
These things are really popular, but every once in a while you’re likely to have a bad reaction. (I once made one for a tip, and popped it up on the bar. When the girl turned around and saw it, for just that split second, it looked real. She let out a scream at the top of her lungs, and must have jumped three feet straight into the air. She was slightly arachnophobic. Oops.)
- back to more dollar bill origami
- back to more origami instructions
- back to home page
- back to site map
- Like Us on Facebook
-
Dollar Bill Origami Diagrams
Intro to $
A to G

H to Z

Animals

Plants

Heart, Star

Clothing

Graduation

Other

Videos