Money Sailboat
by Clay Randall
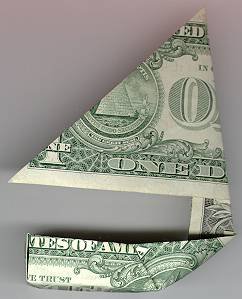
This money sailboat is by Clay Randall and used to be found on this web site: http://members.cox.net/crandall11/money/sailboat/
But this site is no longer active and we have captured the image and reproduce it here. Please contact us if you are the rightful owner of this diagram and wish for it to be removed. Otherwise, thank you for sharing your talent.
Part I – The Sail

Start by folding a corner in at a 45 degree angle so that the side edge exactly meets the bottom edge.

Fold the opposite side in so that it meets the first fold.
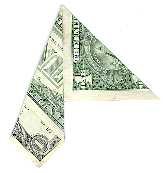
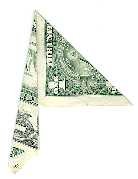
Refold the longer side into the original fold twice. This section will end up becoming the “mast” of the sailboat. (At this point it starts to get difficult to try to keep the folds tight and neat since we’re getting to four layers at the fold, but it is important to do the best you can.)
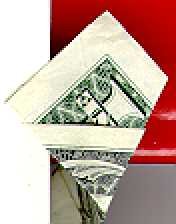
At the end of the “mast”, flatten out the end of all the layered folds as shown. (This really doesn’t show up on the scans well. If you can’t see it from this picture, look at the next to get an idea of where we’re going.)
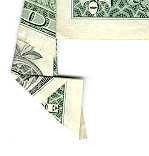
For the flat section created above (not further up the mast), reverse fold along the mast folds created in the steps 2 & 3. This will create two "wings", one along either side of the mast. These end up being used later to attach the sail to the hull.
The sail is done. Easy, no?
Part II – The Hull
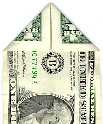
Start with the second bill. Fold precisely in half lengthwise, then unfold. Using the crease from this fold to guide you, fold both corners of one end in to the centerline as shown. These folds will later form the prow, and I’ll refer to them below as the prow folds. (For the less nautically-inclined reader, "prow" refers to the forward part of a ship’s hull.)


Unfold the previous folds, but retain the creases created, they will be needed later. Now fold the bill precisely in thirds lengthwise. (It takes a little practice to be able to be able to eye-ball this fold, but it comes with practice.) These folds will separate the bottom from the sides of the hull, and I’ll refer to them below as the hull folds.
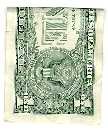
Unfold the previous folds, but again, retain the creases created. Fold the bill in half end-to-end and crease hard. This fold will separate the stern from the bottom of the hull. I’ll refer to it below as the stern fold. (For you ‘land-lubbers’, the "stern" is the rear part of a ship or boat.)
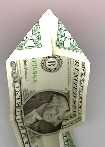
Refold the prow folds. Re-crease the hull folds up so that each of the sides is about 90 degress from the center (‘U’-shaped.) Re-crease the stern fold. Note that the hull folds and the stern folds are opposing. So…
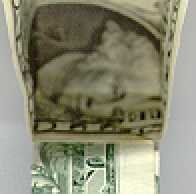
Force the hull and stern folds to form the corners of a box, as shown here (or as well as can be shown on a flatbed scanner). For the whole scheme to work out, both of these intersecting folds have to fold in toward the center. As shown, the portion of the bill between the prow and the stern fold is
open, while the remainder of the bill along the hull folds becomes a flat tab sticking up.
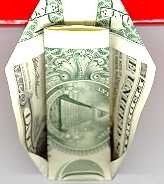
Okay, that flat tab is now folded over the stern into the interior of the boat. As shown, make this fold so that it forces a little of both gunwales to wrap down. ("Gunwale" = the upper edges of the hull’s sides.) The width of the white border of the bill is about right for the overlap. Don’t try to fix the gunwales yet. Take the remainder of the ‘flat tab’ and force it to conform to the inside of the stern, and along the deck. Although it’s slipping in the picture, you want the end of the tab to be behind the edges created by the prow folds.
You’re going to make the prow folds meet the gunwales. To do this, take a hold of the prow fold in one hand where it meets the side, and take hold of gunwale about one half an inch (a little over a centimeter for some of you) away in the other hand.

Force an ‘S’ bend to form at that point and angle the prow line to the gunwale. The prow fold should line up with the top of the printing (not the edge of the bill) at the top. Also, the direction of the S bend should force the prow fold to the inside of the boat.
Use the S bend to lead you to create two folds that form a ‘V’, where the two folds meet at the hull fold. (Look at the first picture until the instructions makes sense, or until you figure it out on your own, which ever happens first. I’m a programmer, not a documentation specialist!)
Once you’ve got those folds, you form the gunwales by folding the edges over from prow to stern. (Remember back two steps? We wrapped the ‘flat tab’ over a little. Here’s where it comes in handy.)
Since so many people seem to be having problems with this part, I’ve added some more pictures.
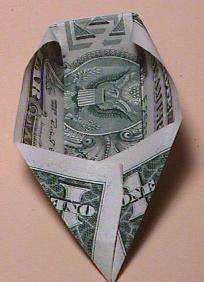
You should have ended up with something that looks like this picture when you refolded the prow folds.
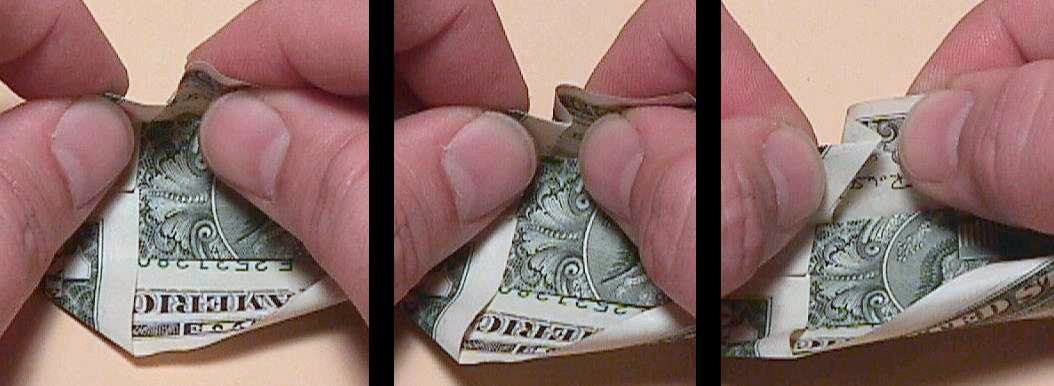
Skew the end slightly to one side, and tuck what you can under the previous wrap as shown. If you have wrapped the "nosepiece" tightly enough, this will keep it all together.
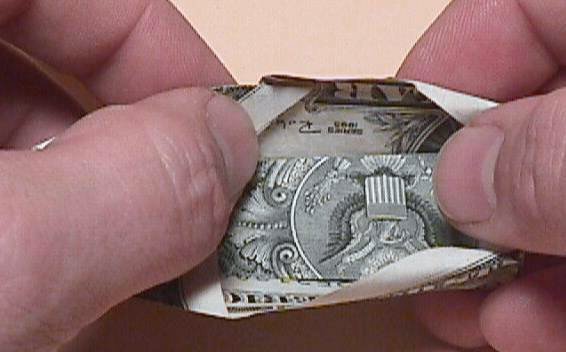
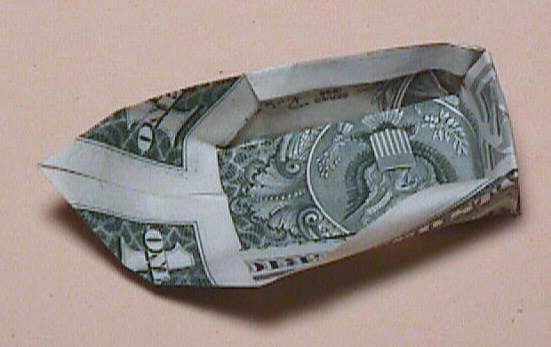

The second and third pictures show the outside and inside after the gunwale fold.
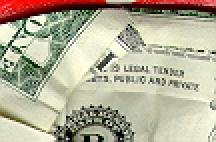
Sorry, but this is the best picture I could come up with on a flatbed scanner.

This picture shows the completed hull from the top. Both gunwales have been completed.
If you get it just right, it looks pretty ‘ship-shape’. If you didn’t get this right the first time, go back to the previous step and fix the prow-fold to gunwale points. They should be even and make the side match up properly. They also hold most everything together.

Here’s the finished product.
("What??? Didn’t you skip something?!?")
No, actually the only instruction for attaching the sail to the hull is to unfold the prow folds to allow the ‘wings’ at the base of the mast to slide under. Then just push the prow folds back in place. As I mentioned above, I usually insert the sail as I’m going along, but it’s simple enough to do afterward.
These things are really top-heavy. If you want them to stand upright on their own you have two choices:
- Make certain that the mast is coming straight up from the base (not leaning to one side), and that the sail follows the centerline of the boat to
the rear. - Place a coin or two of ballast in the bottom of the boat. (The coins can be effectively hidden and secured by installing them in between the bottom of the boat and the ‘flat tab’.)
Reliable sources have told me that with ballast, they will float quite nicely for several minutes (until the bill absorbs enough water to get soggy and come apart on it’s own). I’ve never actually tried it myself!
- back to more dollar bill origami
- back to more origami instructions
- back to home page
- back to site map
- Like Us on Facebook
-
Books with Dollar Bill Origami
- The Buck Book by Anne A Johnson (book review)
- The Guide to Hawaiian Style Money Folds by Jodi Fukumoto (book review)
- The Guide to American Money Folds by Jodi Fukumoto (book review)
- Dollar Bill Origami by John Montroll (book review)
- Dollar Bill Animals in Origami by John Montroll
- Origami with Dollar Bills: Another Way to Impress People with Your Money! by Duy Nguyen
- Money Folding (Origami Favorites Series) by Florence Temko
Please Help
Please help by reporting broken links so that we can fix them. One easy message from you can save us hours and hours of clicking. Thanks!
-
More Origami Diagrams and Instructions…
-
These free origami instructions are made available to you by the paper folding community at large. If you have a diagram you would like to share, or if your diagram is listed here and you wish to have it removed, please Contact Us. Diagrams are intended for personal use. Copyright of the models lie with the origami creators and designers. Please contact the designer and/or creator directly for non-private usage of a model and/or artwork.

