How To Make Origami Jewelry
General Tips about How to Make Origami Jewelry:
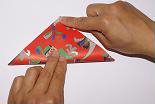
Practice
Always practice folding the origami piece before you settle into the process of converting it into jewelry. If you are not familiar with the origami, you may wish to fold a larger sheet of paper first (6″x6″), then progress to smaller and smaller sizes. Poorly folded origami models will not produce beautiful jewelry by magic. Do not assume that the “bad side” will be hidden from view, rather, take the time to make the best origami model before you transform it into a piece of wearable jewelry. Nine out of ten times, people who admire your jewelry will almost always turn it over to see the backside.
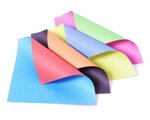
Paper
The type of paper you use for making origami jewelry is not critical. As in the case of regular sized origami, any sheet of paper will work: origami paper, wrapping paper, office paper, and others. However:
- avoid paper that is very thick, this will make your jewelry look bulky instead of elegant,
- avoid paper that is very thin (tissue paper) because it will not maintain its shape,
- avoid paper with large images because small sized origami (for example, earrings) will not have sufficient surface area to show the pattern,
- choose solid color paper or paper with small designs (chaotic or random designs also work well),
- be careful when choosing shiny, foil paper or holographic paper: these may seem interesting but may end up being gaudy. These papers also do not coat well (see below about coating & finishes).
Shape
If your origami piece starts with a square, be very sure that the sheet is exactly a square. Any discrepancies in shape will be magnified when dealing with small-sized origami models. For example, a millimeter difference is not noticeable when working with 15 cm paper, however this difference is significant when working with a 2 cm square. Take particular care in cutting your paper into an exact square (see how to do it here), or you can buy mini origami paper already cut into 1 inch squares.
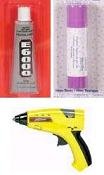
Glue
With time, all origami models will loosen and relax. Keep your origami jewelry looking fresh by using glue to keep the model intact. Almost any type of glue will work but try to use glue that is acid-free and dries clear. Using an excessive amount of glue may cause the paper to buckle and warp. Thus, glue should have enough adhesive power so that only the smallest smear will give maximum bondage.
Glue can be as simple as a fresh tube of glue stick or Elmer’s white glue, this is especially true if you are gluing paper to paper. On the other hand, fast-acting epoxy glue or a glue gun will be necessary when gluing paper to jewelry components such as bar pins or barrettes. There are jewelry glues specifically designed for making jewelry; though you should avoid glues which require mixing of two components because the unused portions are wasted.
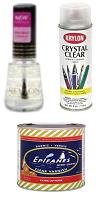
Coating & Finishes
For fast and easy origami jewelry, simply fold the origami, attach the proper findings and you’re done. For jewelry that is intended for extended use, protect the origami by applying a clear, waterproof coating. Coating the origami will preserve it against the environment (rain, dust), your body (sweat, oils) and incidentals (food, drinks). Certainly, origami jewelry will not survive torrential rains but you can protected it from humidity, fog, and mild showers.
The protective coating can be as simple as clear nail polish, or can be as complex as an clear acrylic spray or shellac aerosol sprays.
Craft stores will offer a huge range of coatings and sealants with a glossy, semi-gloss, or matte finish. You will need to try to see what works best for you.
Be aware that some coatings may alter the color of the paper (yellowing or deepening of color). Some sealants absorb into the paper at different rates causing splotches, and foil paper does not coat well at all.
In general, it is better to spray on the sealant or apply a thin layer with a small paint brush. Multiple applications may be necessary: always allow the sealant to dry before applying a second or third layer. You can dip the entire origami model into a cannister of varnish, but this will cause rounded corners and less defined lines.
Waiting for coatings to dry may seem tiresome, but it is better to protect your origami jewelry rather than see it disintegrate due to rain or a spilled drink.
-
Books with Origami Jewelry
- Origami Jewelry: More Than 40 Exquisite Designs by Ayako Brodek | (book review)
- Origami Jewelry Motifs by Julian Laboy-Rodriguez
- Origami Jewelry by Mayumi Jezewski and Marina Orry
- LaFosse & Alexander’s Origami Jewelry by Michael G. LaFosse and Richard L. Alexander
- Origami Jewelry: A Step-by-Step Guide by Monika Cilmi
Please Help
Please help by reporting broken links so that we can fix them. One easy message from you can save us hours and hours of clicking. Thanks!
-
More Origami Diagrams and Instructions…
 Animals
 Birds
Birds Boxes
Boxes Butterflies
 Dinosaurs
 Holiday
 Dollar Bill
 Easy Origami
 Fish & Sea Life
 Flowers
 Hearts
 Insects
 Modular
 Paper Airplane
 Paper Cranes
 Polyhedra
 Reptile
 Star Wars
 Stars
Stars Vehicles
-
These free origami instructions are made available to you by the paper folding community at large. If you have a diagram you would like to share, or if your diagram is listed here and you wish to have it removed, please Contact Us. Diagrams are intended for personal use. Copyright of the models lie with the origami creators and designers. Please contact the designer and/or creator directly for non-private usage of a model and/or artwork.