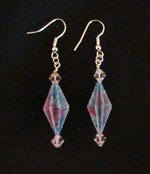
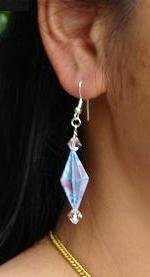
Fluted Diamond Earrings


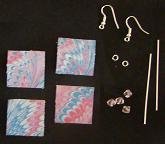
To make these earrings, you will need:
- round nose pliers,
- wire cutter,
- a pin or needle
- two 2″ head pins,
- two earring hooks
- two 4 mm jump rings,
- 4 beads, and
- two fluted diamonds; (instructions here)
optional: - glue
- clear, waterproof sealant.
- read/buy supplies here)
Fluted Diamond Earrings Instructions

Cut four pieces of paper that is about 1″ x 1″. Fold these in half twice (left to right, then top to bottom). Use a needle or pin to poke a hole in the middle of the paper. Fold these punctured papers according to (instructions) but do not assemble the units yet.- Thread a bead onto a head pin. Next, add the bottom and top halves of the fluted diamond.
- Assemble the Fluted Diamond so that the flaps are all tucked into the pockets forming a beautiful diamond shape. Flare apart the layers evenly. Thread on one more bead.

Use a pair of round nose pliers and grasp the head pin about an eighth of an inch above the bead. Bend the the head pin so that it is perpendicular to the length of the earring.- Wrap the free end of the wire around the tip of the pliers, this will cause the wire to form a loop.
- Wrap the end of the wire around the base of the loop (below the loop but above the bead). This might be easier if you use two pairs of pliers: one to hold the loop steady while the second pliers wraps the wire around.
- If there is excess wiring, use wire cutters to cut off the tail end of the wire. Tidy up the construction by aligning the loop so it appears round and symmetrical. Cinch any wires that are protruding.

Open a jump ring and hook it onto the loop made above. Note: open jump rings by twisting the two ends apart from one another, avoid pulling the ends apart since this will distort the shape of the ring (details here).- Hook an earring wire onto the jump ring. Close the jump ring and you’re done!
An alternative method of making the Fluted Diamond earrings is to assemble the origami model before threading it onto the head pin. This will allow you to apply a dot of glue to help keep the two origami halves together before proceeding. You can also apply a protective layer (read more about coatings here) such as clear nail polish, varnish, or shellac. After everything is completely dry, continue the project by threading the components onto a head pin.


-
Books with Origami Jewelry
- Origami Jewelry: More Than 40 Exquisite Designs by Ayako Brodek | (book review)
- Origami Jewelry Motifs by Julian Laboy-Rodriguez
- Origami Jewelry by Mayumi Jezewski and Marina Orry
- LaFosse & Alexander’s Origami Jewelry by Michael G. LaFosse and Richard L. Alexander
- Origami Jewelry: A Step-by-Step Guide by Monika Cilmi
Please Help
Please help by reporting broken links so that we can fix them. One easy message from you can save us hours and hours of clicking. Thanks!
-
More Origami Diagrams and Instructions…
-
These free origami instructions are made available to you by the paper folding community at large. If you have a diagram you would like to share, or if your diagram is listed here and you wish to have it removed, please Contact Us. Diagrams are intended for personal use. Copyright of the models lie with the origami creators and designers. Please contact the designer and/or creator directly for non-private usage of a model and/or artwork.


