Fir Tree
by F Guarnieri
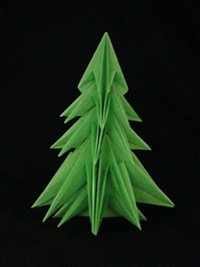
Every time I see an origami tree created by Francesco Guarnieri, I always think, “This is the most beautiful tree ever!” But then I see his next tree and think the next tree is even better.
This page is a “help page” for folding Abete 2 (Fir Tree 2) created by F Guarnieri. His flickr site shows only a crease pattern. The photos below will show you how to attain the crease pattern and how to collapse it into Fir Tree 2.
The original design consists of 5 tiers (layers). Instructions for the top tier is shown. Guarnieri recommends using paper squares that are:
10 cm x 10 cm
16 cm x 16 cm
20 cm x 20 cm (two)
29.7 cm x 29.7 cm (I used 30 cm x 30 cm)
It is best to use paper that is the same color on both sides because both sides will be visible in the finished model.
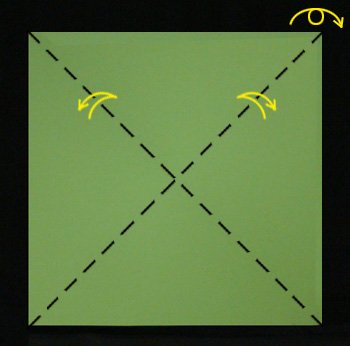
Fold & unfold along diagonals.
Turn paper over.
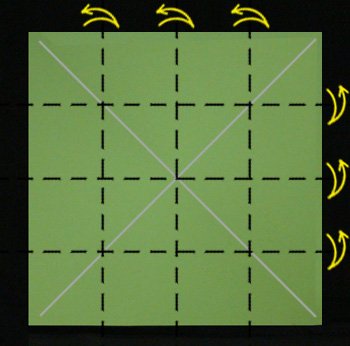
Fold & unfold into 4 x 4 grid.
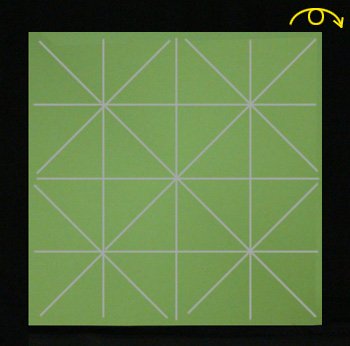
This is how the CP looks like.
Turn paper over.
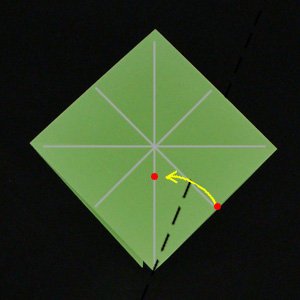
Fold and unfold as shown.
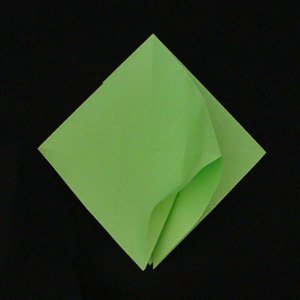
This is how it looks like.

Fold and unfold as shown.
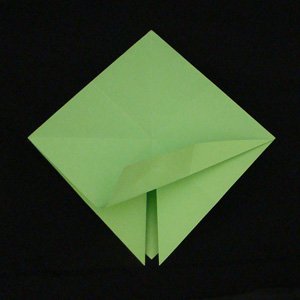
This is how it looks like.

Fold and unfold as shown.

This is how it looks like.

Fold and unfold as shown.

This is how it looks like.
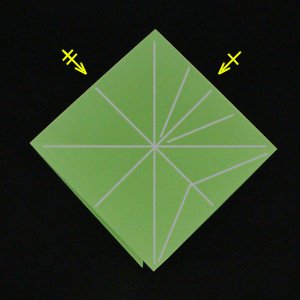
Repeat on the other 3 flaps.
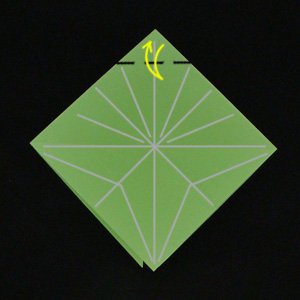
Fold top down in preparation for sink fold.
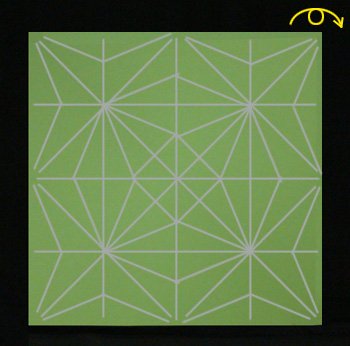
Unfold completely. Turn paper over.

Valley folds along diagonals.

Mountain folds along inner square (this is for sink fold).

Mountain folds along creases outside of center square.

More mountain folds.

Finally, mountain folds along the edge of the paper.
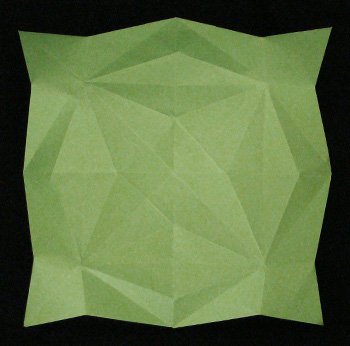
This is how it looks like.
Collapse Crease Pattern into Model

Lift the edges so there is a large square at the bottom, like a box. Pinch the bottom of the square so the sides snap together.
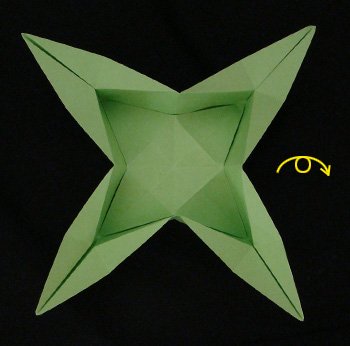
It looks almost like a flower.
Turn model over.

Bring the 4 points together.

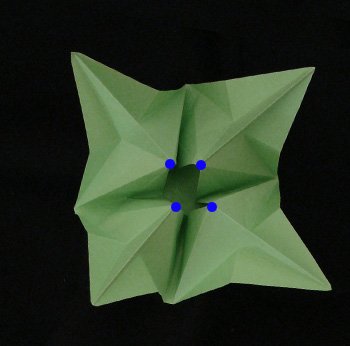

Turn model over.
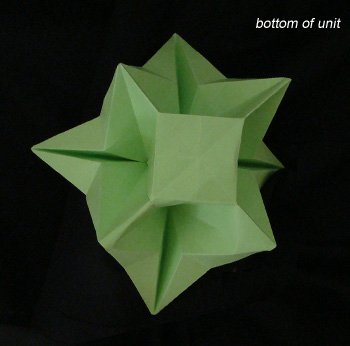
This is the bottom of the model.
Sink the small central square.


Push in one side so the model is more compressed.
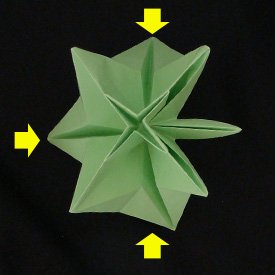
Repeat on the other 3 sides.

This unit is done. This is bottom view.

Top view.
Assemble Tiers

Pinch the bottom of a small unit and compress the sink fold. Slide this into the gaps at the top of a larger unit. Repeat until all tiers are assembled.
More Origami Trees
-
Christmas Origami Themed Books
- Quick & Easy Origami Christmas by T Takahama
- Easy Christmas Origami by J Montroll
- Christmas Origami by J Montroll
- Origami for Christmas by C Araki
Please Help
Please help by reporting broken links so that we can fix them. One easy message from you can save us hours and hours of clicking. Thanks!
-
More Origami Diagrams and Instructions…
-
These free origami instructions are made available to you by the paper folding community at large. If you have a diagram you would like to share, or if your diagram is listed here and you wish to have it removed, please Contact Us. Diagrams are intended for personal use. Copyright of the models lie with the origami creators and designers. Please contact the designer and/or creator directly for non-private usage of a model and/or artwork.


