Quilling Straight Husking

Husking is a technique in quilling which allows you to form looped shapes of defined size. There are two styles of huskings:
      • Straight Husking
      • Fan Shaped Husking

When making standard quilling coils, you wrap the paper around a slotted tool, remove the plug of paper, and then allow the paper to unravel a little to get a loose coil (instructions). The size of the coil will depend on how tight you wrapped the paper and how long you allow it to unravel. It can be challenging to make coils of the exact size because it is not easy to control the unraveling process (a cirlce template helps control the size of a loose coil).

With husking, this is not a problem. Husking produces loops of the same size and they look almost identical every time. Here, the paper strip is wrapped around pins – the pins define the location where the paper will be placed down. Husking is a more controlled process allowing for a more uniform project.

Quilling Straight Husking

    quilling straight husking

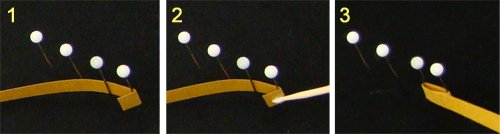
  1. Place 4 or 5 pins in a straight line.
    Take a strip of paper and fold the end to form a hook.
    Hook the paper onto the first pin.
  2. Place a dab of glue on the paper on the outside of the hook.
  3. Wrap the long end of the paper around the second pin, bring it back towards the first pin to form a loop. Pinch the papers to glue them together.
  4.  
    quilling husking

  5. Bring the paper towards the third pin.
  6. Apply a dab of glue on the paper near the first pin.
  7. Wrap the paper around the third pin, bring it back towards the first pin, and pinch the papers to glue them together.
  8.  
    quilling husking

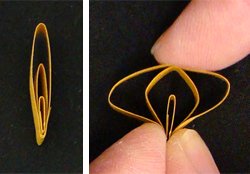
  9. Continue wrapping the paper around the pins and glueing the layers of paper together at the base of the first pin.
  10. Repeat the process until all the pins are used up.
  11. When done, cut off excess paper and glue the tail end of the paper to the husking.
  12. Remove pins and then remove your husking.
quilling husking
 
Depending on how tightly you wrap the paper, the husking can be narrow or wide. If it is too narrow, press down on the top of the husking to widen the loops.
quilling husking
 
Shown are three quilling straight husking made the same way but with different widths. They look very different from one another!

quilling husking
 
You can place more pins to get more loops. You can place the pins at different distances from one another to get a different pattern. The husking on the left was made with 4 pins. The husking on the right used 6 pins but the distance between third and fourth pins is double the distance of the other pins.

quilling husking

quilling husking board

 
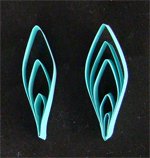
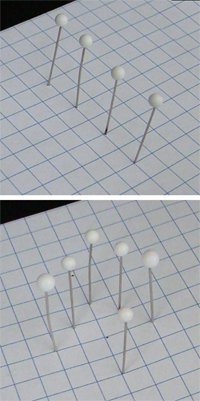
To get uniform huskings, use a grid or graph paper so you know where to place the pins every time.


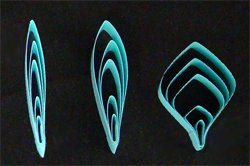
< ----   pins in a straight line for Straight Husking


< ---   pins in a fan shape for Fan Shaped Husking


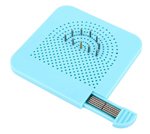
          You can also purchase a A quilling husking board.
< ---   This is a device with peg holes arranged so you can make straight or fanned husking.

  •  
     

    Please Help

    Please help by reporting broken links so that we can fix them. One easy message from you can save us hours and hours of clicking. Thanks!

  •  

    More Origami Diagrams and Instructions…

  • These free origami instructions are made available to you by the paper folding community at large. If you have a diagram you would like to share, or if your diagram is listed here and you wish to have it removed, please Contact Us. Diagrams are intended for personal use. Copyright of the models lie with the origami creators and designers. Please contact the designer and/or creator directly for non-private usage of a model and/or artwork.