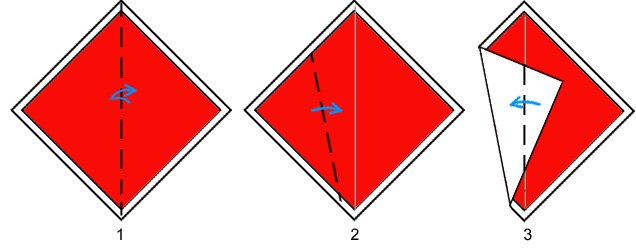
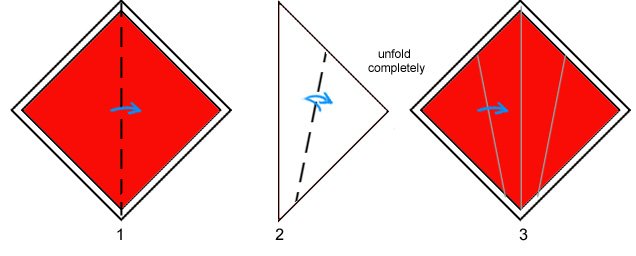
METHOD 1: straightforward, has a linear progression, and gives clean lines.
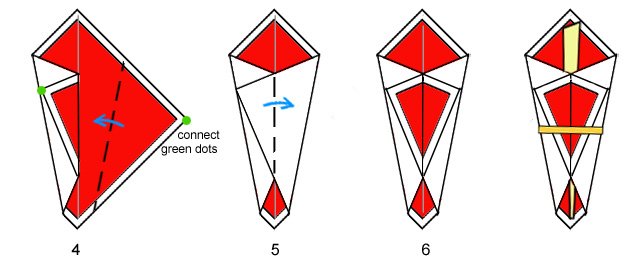
METHOD 2: gives a more symmetrical model but involves a reverse fold.

Traditionally, noshi was made with two rectangular sheets of paper, one was red and the other was white. The two sheets were placed one on top of the other and folded as if they were one. This was necessary probably because they did not have double sided origami paper. Shown above is two square sheet of paper with the red sheet cut slightly smaller than the white sheet.
As shown on the last image, the completed noshi often has a strip of textured paper inserted into the wrapper. This strip of paper (often yellow in color) represents stretched and dried abalone (shellfish). The entire wrapper is bound with a strip of paper (often gold or silver in color).
The noshi wrapper can also be bound with Mizuhiki. Mizuhiki is a bundle of stiff string knotted in a decorative manner. The knotting of mizuhiki is an art in itself (read more here).
![]()
go back to History of Origami
Home Page
more Origami Instructions
Site Map
Photo: envelope held together with mizuhiki from ebay.
 ’
It is believed that Noshi wrappers were used in Japan as early as the 12th century. In modern Japan, noshi is still attached to gifts as a token of good luck. However, very few people fold their own noshi, rather they can be purchased the same way an American might buy a bag of gift bows to attach to Christmas presents.
Read more about noshi from Isao Honda’s Noshi: Classic Japanese Origami or Eric Kenneway’s Complete Origami
: An A-Z of facts and folds, with step-by-step instructions for over 100 projects.


