Quilling: Fan Shaped Husking
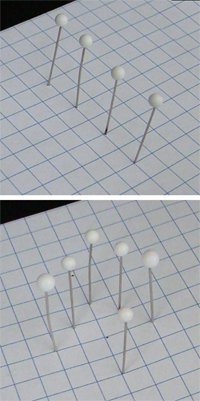
- Place 6 or more pins in a circular pattern.
- Take your quilling paper and fold the end to form a hook.
Hook the paper onto the first pin. - Place a dab of glue on the paper on the outside of the hook.
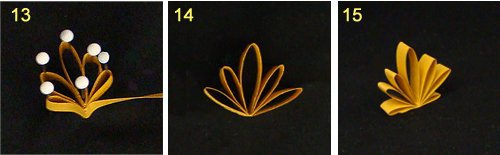
- Wrap the long end of the paper around the fourth pin (or the pin that marks the tallest point of the fan shape.
- Bring the paper back towards the first pin to form a loop. Pinch the papers to glue them together.
- Weave the paper towards the fifth pin (a pin adjacent to the one just used).
- Apply a dab of glue on the paper near the first pin.
- Wrap the paper around the fifth pin, bring it back towards the first pin, and hold the papers together at the base of the fan shape until the glue sets.
- Wrap the paper around the third pin (the pin on the other side of the tallest point of fan shape).
- Place a dab of glue on the paper near the first pin and repeat the process.
- Weave the paper around the pins alternate from one side to the other side until all the pins are used up.
- The husking should look like a fan shape.
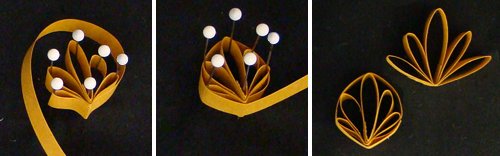
- When done, you have two choices. You can cut off excess paper and glue the tail end of the paper to the husking.
- Remove pins and then remove your husking.
- The fan shape husking is beautiful and can even stand upright.
- Another choice is to wrap the paper around the entire husking one or more times. You can use the same length of paper or you can use a different strip of paper to get a change in color.
This gives a totally different look. The wrapped husking is more stable and if you want, you can add a dab of glue at each point of contact to secure the final shape.


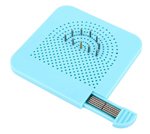
You can also purchase a A quilling husking board.
< --- This is a device with peg holes arranged so you can make straight or fanned husking.


