Pyramid Tree
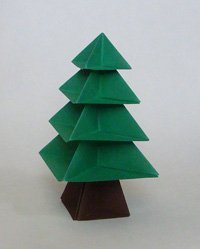
Pyramid Tree: The instructions to this origami tree is all over the internet such that it is not clear who first invented it. Reliable sources suggest that the model was created by Makoto Yamaguchi and first published in NOA Magazine 003 (Dec. 1975). The design is often called Origami Tree or Origami Christmas Tree and sometimes Pyramid-Tree because each layer is shaped like a pyramid.
Each section of the tree is made the same way but using paper that is successively smaller. A typical project might use green paper that is 6″, 5″, 4″, and 3″ squares. The paper becomes difficult to fold if it is smaller than 3″ square so, if you want more layers, you will need to get larger squares of paper.
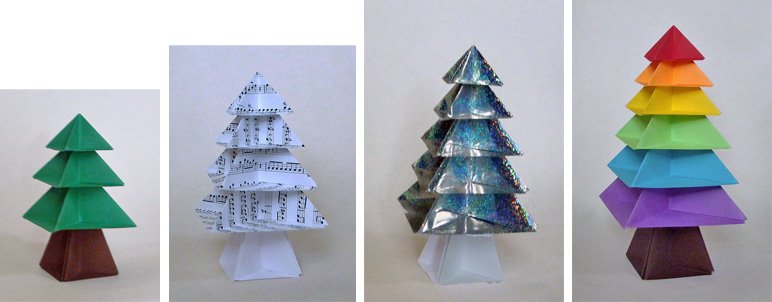
The trunk of the tree should be made with paper the size of the largest unit, in this example, it would be 6″ square. The tree actually looks better if you use paper the size of the second-largest unit (in this example, 5″ square) but the resulting model tends to be more tippy and may fall over.
If you use origami paper which is colored on one side and white on the back side, the white will be visible at the bottom of each pyramid. In the diagram below, origami paper is used so you can follow the steps easier; but the model looks better if you use paper that is the same color on the front and back sides.
Pyramid Tree Tops
-
Fold the top layer of paper so the bottom-corner meets the right-corner (join red dots). You only need to crease the paper up to the mid-line as shown. Unfold.
-
Fold up the top-flap of paper.
-
Repeat steps 1 & 2 on the back side of the model.
-
Like turning pages of a book, turn one page from the right side towards the left. On the back side of the model, turn one page from left to right so there is still 2 flaps on each side of the model.
-
Repeat steps 1 through 3.
Image 6a shows how it looks once all the flaps have been folded up.

-
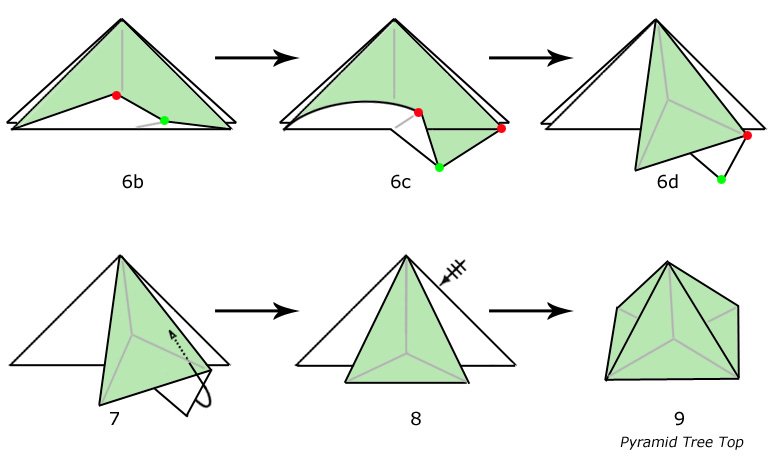
Fold down the top-flap of paper and bring it towards the right (join red dots). As you do this, allow the crease (green dot) to fold down creating a small flap of paper. The model becomes 3D and does not lie flat.
-
Mountain fold the small flap behind the larger triangle and tuck it in between the layers of paper.
-
Repeat step 6 & 7 on the remaining 3 flaps of paper.
-
The last flap may be difficult to fold back and tuck in; however, it does work. Image shows how the model looks once it is done. Make a few of these units in varying sizes. Use paper that is successively 1″ larger or smaller.
Pyramid Tree Trunk
- Start with a Preliminary Base using brown paper.
-
Lift the left flap and make a squash fold.
-
Like turning pages of a book, turn two flaps to the left. Repeat squash fold on the remaining three flaps.
-
Turn the pages of the model so you don’t see the white parts of the paper.

- Make the tree trunk in a similar way as the tree tops.
Fold the bottom-corner towards the right-corner (join red dots).
Crease only up to the midline as shown. Unfold. - Fold up the top-flap.
- Repeat this on the remaining three flaps.
- Fold down the flap and bring the corner toward the right (join red dots). As you do so, allow the crease (green dot) to come down and form a new, smaller triangle.
- Fold back the small triangle and tuck it not behind itself, rather tuck it behind the next flap beside it. This move locks two flaps together. The model becomes 3D and is not flat.
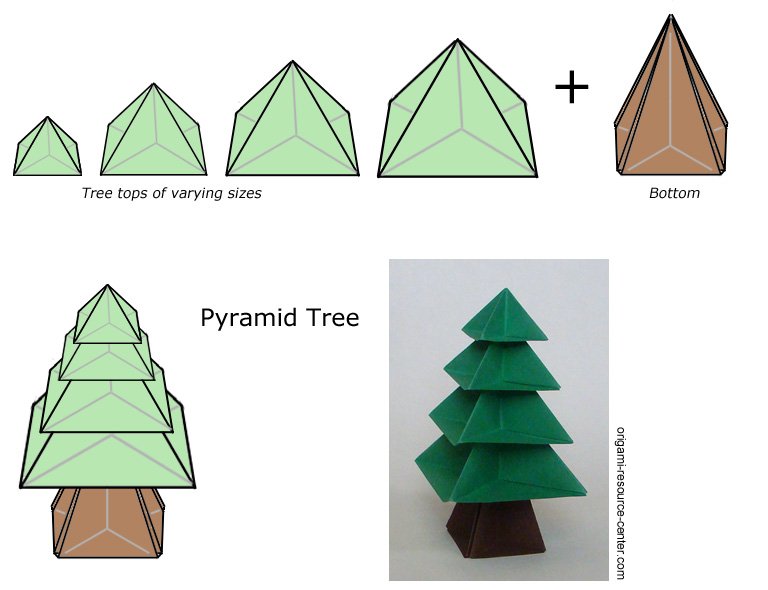
- Repeat step 8 & 9 on the remaining three flaps. The tree trunk is made the same way as the tree tops; the only difference is that the tree trunk is more narrow and each corner is composed of two flaps of paper.Assemble the Pyramid Tree by sliding the pointed top into the base of the layer above.

-
Christmas Origami Themed Books
- Quick & Easy Origami Christmas by T Takahama
- Easy Christmas Origami by J Montroll
- Christmas Origami by J Montroll
- Origami for Christmas by C Araki
Please Help
Please help by reporting broken links so that we can fix them. One easy message from you can save us hours and hours of clicking. Thanks!
-
More Origami Diagrams and Instructions…
-
These free origami instructions are made available to you by the paper folding community at large. If you have a diagram you would like to share, or if your diagram is listed here and you wish to have it removed, please Contact Us. Diagrams are intended for personal use. Copyright of the models lie with the origami creators and designers. Please contact the designer and/or creator directly for non-private usage of a model and/or artwork.


