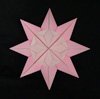
Origami Lucky Star (Wishing Star)

Lucky Stars are fun to make. Kids can sometimes sit and fold hundreds of them. Don’t worry, it’s good for their fine motor skills and it keeps them off the electronic devices.

- Cut a strip of paper that is of the ratio 1:13 (for example, 1″ wide and 13″ long). If you use standard USA 8½ x 11 paper, you can cut off a ½” strip along the 11″ side of the paper and that works fine. You can buy a little kit
which has enough paper in it to make 100 stars; or buy pre-cut strips of paper.
- Start at one end of the strip of paper. Wrap the paper around to form a loop.
- Pass the short-end of the paper into the loop to form a standard over-hand knot.
- Shuffle and scooch the paper along so the knot is at the far end of the paper. Press the knot down to make it flat. Be sure that the paper is pulled tight so there are no holes and gaps at the corners where the paper meets.

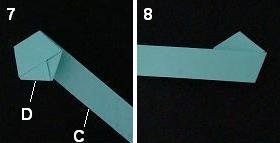
- Fold the short-end of the paper towards the center of the knot. If it is too long, tear off a bit of the paper off so it does not protrude beyond the pentagon shape.
- Now, work with the long-end of the paper. Fold the paper up so edge A aligns flush with edge B.
- Flip the paper over so the long-end of the paper is pointing down again.
- Fold the paper up so edge C aligns flush with edge D.

- Repeat: flip the paper over so the long-end of the paper is pointing down again.
- Fold the paper so edge A aligns with edge B. Repeat this motion
fold : turn-over
fold : turn-over
fold : turn-over
until the paper is too short to continue. Remember to always alternate the alignment of the paper: to the left edge then to the right edge etc.
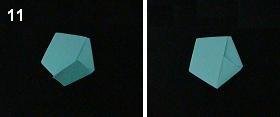
- Tuck the end of the paper under a layer of paper. If the paper is too long, you can tear off a bit of it so it will tuck under the layer nicely.

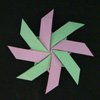
- Hold the pentagon along its edges as if you were holding a coin along the ridges (not on the face). Use your fingernail to push in one of the edges.
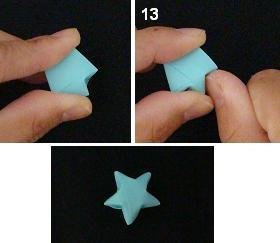
- Rotate and push in the next edge. Repeat until all 5 sides have been pushed in: a star is born!

Useful Tips:
When you make the initial knot, make sure the corners of the paper come together to make a neat pentagon. this sets up a good foundation for the rest of the steps.
When wrapping the paper around and around, be sure to align the edges of the paper one-over-the-other so you keep the pentagon shape.
Lastly, when you are pushing the sides of the pentagon, be sure to hold the pentagon along the edges. Do not hold it with your thumb right ontop of the face (this prevents it from puffing up)


– Lucky stars can be used as fancy packing peanuts.
– You can even super-size them! See more photos here.
- buy strips of paper to make lucky stars
- see diagram diagram instructions
- make lucky star earrings or bracelet
- make different origami stars
- What else can you make with a strip of paper?
- go to Home Page
- go to Site Map