Traditional Origami Rabbit

This traditional origami rabbit is cute and easy to make. You can probably make it in less than 5 minutes. Sometimes, simple is best. The model can be made flat, or it can be made to stand upright.
Traditional Origami Rabbit Instructions

-
- If you are using origami paper, start with the white-side facing up. Fold the paper in half (left to right). Unfold.
- Fold the left-edge and right-edge of the paper towards the central crease.
- Fold the top-edge of the model to the center. Unfold. The crease will be a 1/4 of the way down from the top.

-
- Make valley folds as shown so the top part of the model splays open.
- Fold down the back-layer of paper and press the corners flat (red dot).
- Turn the model over.

-
- Make the ears of the rabbit more narrow by folding the top of the model as shown.
- At the bottom of the model, fold in the corners.
- Fold the model in half (left to right), then rotate quarter turn counter-clockwise.

- Make an inside reverse fold at the back end of the rabbit to form a tail.
- Optional: you can bend the head a little so the model can stand upright.
- Optional: you can draw eyes, whiskers and other decorations.
– Traditional Origami Rabbit as photo-instructions
– Origami Animals
– Easter Origami models
– free origami instructions
– Home Page
– Site Map
-
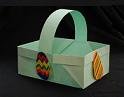
More Easter Themed Origami

")

")
")
")


")

")


