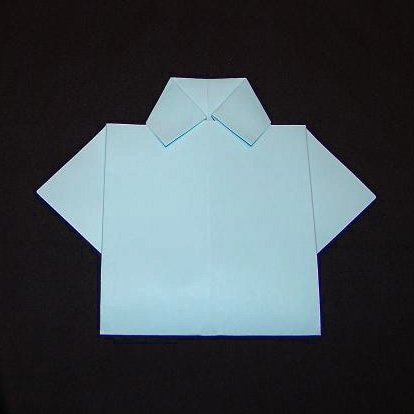
Origami Shirt Instructions
-
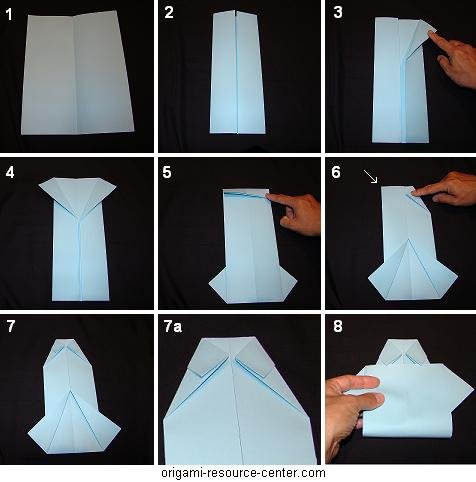
- Start with a rectangular sheet of paper (like a standard USA letter 8.5″ x 11″). Fold it in half lengthwise and unfold. This gives you a central crease down the middle of the sheet.
- Fold the left and right edges of the sheet towards the middle. This gives two flaps.
- Fold the right flap out towards the right side. The exact location or steepness of the fold is not critical. Try somewhere between a quarter to a half way down the sheet.
- Repeat of the other side: fold the left flap out towards the left at an angle. This forms a “V” shape where the paper is peeled away from the central crease.
- Turn the paper and flip over so the “V” is on the bottom and is facing down towards the table. Valley fold (about one inch) of the top edge down towards you.
- Flip the paper again so the “V” is now facing up. Fold the right corner of the paper towards the middle crease.
- Repeat with the left side: fold the top left corner towards the center allowing the two corners to meet in the middle (left corner is shown with an arrow).Image 7a is a close-up. Step 6 and 7 form the collar of the shirt.
- Bring the bottom of the paper up and slide it under the collar. Now you can see how steps 3 and 4 formed the sleeves of the shirt.
- Press the bottom of the shirt firmly and you’re done!
– You can leave your shirt as is;
– You can add an origami tie and write a message on the back of the shirt;
– Or you can undo step 8, write a message inside, and then redo step 8.
-
- learn how to make another easy origami shirt
- see more origami instructions
- go to Site Map
- Like Us on Facebook


