Origami Fancy Heart

This Origami Fancy Heart is made with a rectangular sheet of paper. The easiest way to handle this is to take a square sheet of paper and cut it in half to get two rectangles. You can actually make the model using any size rectangle that is of ratio 2:1 or larger (more long than it is wide). You might know this model as as $Change of Heart which is made with a USA dollar bill.
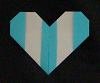
If you use origami paper which is white on the back side, the center of the model will be white. If you use copy paper which is the same color on both sides, then the entire heart will be of the same color.
Origami Fancy Heart instructions

- Start with a square sheet of paper with the white-side facing up.
Cut in half to get two rectangles. Use one for one heart.

- Valley fold & unfold as shown to get an X-shaped crease.
Repeat on the other side of the paper. - Make two mountain folds at the exact location where the two creases from step 2 meet (in the middle of the X crease). Unfold.

- Collapse the model using the creases made above. It is like making two waterbomb bases. Note the movement of the red dot. Image 4b shows the collapse in progress and image 4c shows when the collapse is complete.

- For the top-left side: valley fold the flap so the corner points to the left.
For the bottom-left: valley fold the flap to the left.
Repeat on the right side of the model: fold the top corner towards the right and fold the bottom-right corner towards the right. - Work with the top-left panel: unfold the flap slightly so it stands upright. It will look like image 6b. Squash down the tip of the paper so it lays flat like in image 6c below. Watch the movement of the red dot

Repeat the squash fold on the other 3 panels.
- Work with the top-left panel (image is enlarged):
Fold the edges of the square panel towards the diagonal crease. Unfold.

- Lift one of the edges so the paper stands upright.
Repeat the squash fold as you did in step 6.
Press down so the paper lays flat. - This is how it looks like when both edges have been squashed. Repeat on the other edge of the paper.

- Repeat steps 7 & 8 on the other 3 square panels.
- Mountain fold (fold behind) the back part of the model.
- Mountain fold (fold back) the left and right corner of the model to round out the heart shape.

- Origami Fancy Heart is done.
 |
– more origami heart instructions – free origami instructions – Home Page – Site Map |
-
More Origami Hearts