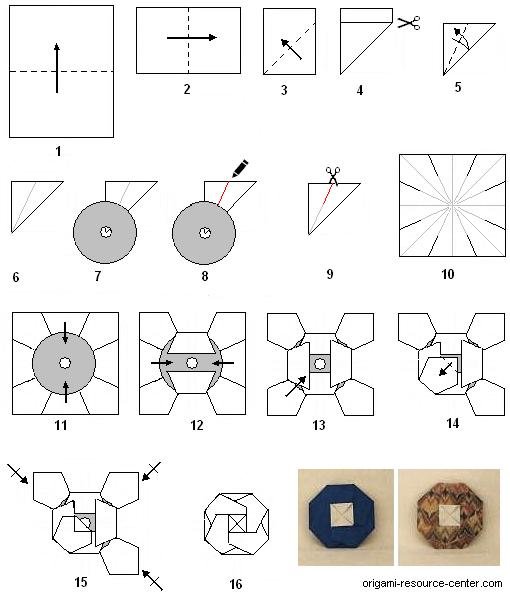
- Take a piece of paper and fold it in half by bringing the bottom-edge towards the top.
- Fold in half again by bringing the left-edge towards the right.
- Fold in half yet again by bringing the bottom-right corner towards the left-edge. This forms a triangle with an overhang.
- Cut off the excess overhang.
- Make a crease mark by folding the left-edge towards the diagonal-edge. Fold and then unfold.
- This bisects the triangle into two smaller triangles.
- Place a CD on top of the paper. Align the CD so its center is exactly at the bottom tip of the triangle as shown.
- Use a pencil/pen and mark the crease made in step 5 & 6. Mark only the area not covered by the CD,
- Cut along the drawn line.
- Unfold the paper completely. You should have a square with 8 cuts.
- Place a CD in the center of the paper and fold the top and bottom flaps inwards.
- Fold the left and right flaps inwards.
- Fold a diagonal-flap inwards.
- Fold the tip of this diagonal flap back a little. The folded edge should align with the center of the CD.
- Repeat steps 13 & 14 with the remaining 3 flaps.
- Tuck the last flap under the first flap to lock the CD cover in place.Beautiful!
- see more CD Covers
- see other origami diagrams
- go to site map


