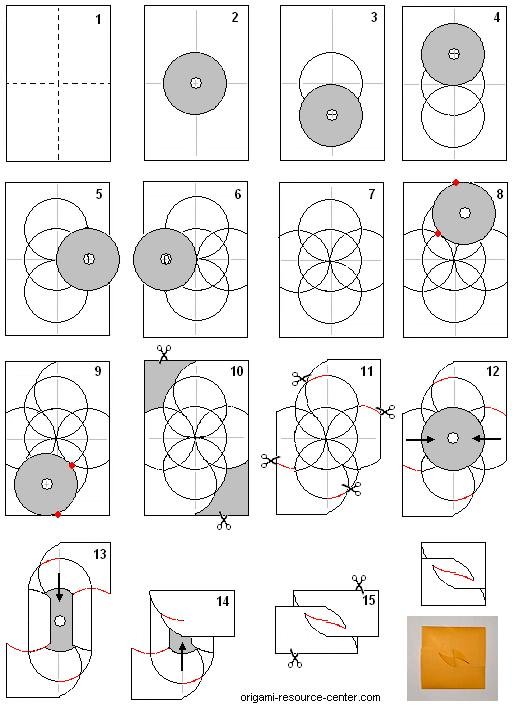
- Take a piece of paper and fold it into quarters. The center is where the two creases intersect.
- Place a CD in the center of the paper and trace a circle around the CD.
- Slide the CD down until the top of the CD is at the center of the paper and the center of the CD aligns with the bottom-edge of the traced circle. Trace the CD.
- Slide the CD up until the bottom of the CD is at the center of the paper and the center of the CD aligns with the top-edge of the central, traced circle. Trace the CD.
- Slide the CD towards the right and trace the CD in a similar fashion.
- Repeat one more time with the CD placed on the left.
- This produces a beautiful pattern that will be the CD Cover. The next 2 steps will form the locking clasp.
- Position the CD towards the upper left as shown and trace a half circle. Note the red dots which show the position of the CD relative to the traced circles.
- Repeat at the lower right.
- Cut off the top-left and bottom-right sections (shaded areas).
- Make the clasps by cutting along the red lines as shown. Requires 4 snips.
- Place a CD in the middle of the paper. Fold the left and right flaps inwards.
- Fold the top flap down.
- Fold the bottom flap up and interlace the clasps around one another.
- Cut off extra overhangs.Done!
- see more CD Covers
- see other origami diagrams
- go to site map