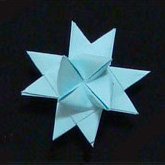
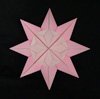
Moravian Star

This page shows how to make a Moravian Star using 4 strips of paper. Although the task is not particularly hard, those who have never made one before may find it a bit confusing. But after 2 or 3 tries, you will be able to make them with your eyes closed!
The creation of Moravian Stars can be divided into 6 parts:
1. Make a Central Square
2. Make a second Central Square
3. Make Four Points
4. Make second set of Four Points
5. Make Four Peaks
6. Make second set of Four Peaks.
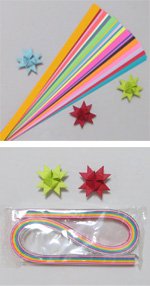
Start by getting 4 strips of paper with 1:24 ratio. This means paper widths and lengths should be:

A. Fold the strips in half.
B. Trim the ends to make them tapered.
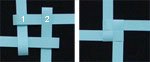
C. Weave the 4 strips together as shown. For example, both ends of strip 1 should be in between strip 2.
D. Scoot the strips together to tighten the central square.
Part 2: Make Second Central Square

- Fold the top-left strip down.
- Fold the left strip to the right.
- Fold the bottom-right strip up.
- Finally, fold the right-top strip to the left.
- This is how it should look.
- Weave this last strip under the layer made in step A.
Part 3: Make Four Points

- Fold the top-right strip behind and towards the right. Make sharp crease, 45 degree angle.
- Fold the same strip down so it is adjacent to its original location. Again, sharp crease at 45 degree angle.
- Fold this strip to the left so it lies ontop of itself.
- It should look like this.
- Grasp the point firmly then weave the tail-end of the strip under the layer just below it.
- It should look like this.

Rotate the paper quarter-turn, clockwise. Repeat the above steps 3 more times.
- When completing the steps on the last strip, you will need to lift a strip out of the way in order to weave the last strip.
- When done, it should look like this.
Part 4: Make Second Set of Four Points

- Flip the entire model bottom-side up and repeat the steps as in Part 3.
- When done, it should look like this.
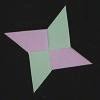
- The 8 points are outlined in white, some are hidden under layers.
Part 5: Make Four Peaks
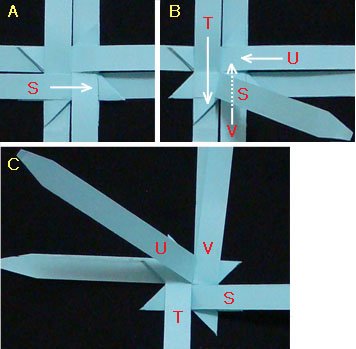
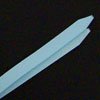
Get ready to make the 4 peaks by re-arranging the strips of paper.
- Moved the strip marked with red S to the right to get it out of the way.
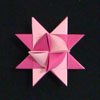
- Fold the strip marked with a red T down. Fold the strip marked with the red U to the left. Fold the strip marked with a red V up. Lastly, fold the strip marked with a red S to the right more firmly.
- It should look like this.

This next section is probably the most difficult part. If necessary, use tweezers to help grasp and pull the tapered ends of the paper.
- Fold the top-right strip towards the right. Make a sharp crease, 45 degrees angle.
- Turn the same strip of paper around so it is pointing towards the left.
- When looping this strip of paper around, be sure not to flip it bottom-side up. Notice the line drawn on the strip of paper – this black line faces up all the time.
- Tuck the strip of paper under the layer marked with a red X.
- If you lift the strip marked with a red X you will see that the strip of paper comes out from the points made in part 3 and 4.
- Pull the strip all the way through. It will form a peak which is perpendicular to the points.

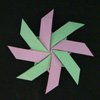
Rotate the model quarter turn, clockwise and repeat to form 3 more peaks.
- Shown are 2 peaks.
- Shown are 3 peaks.
- Shown are 4 peaks.
Part 6: Make a Second Set of Four Peaks

-
- Turn the model over to work on the other side.
- Rearrange the strips as in Part 5A above.
- Make the 4 peaks as described above.

- Use scissors to cut excess paper.
This Moravian Star is 3 dimensional.
Looks great!
|
Note: if you are using a strip of paper that is just barely long enough to complete a Moravian Star, then here is a useful tip: instead of folding the strips in half, offset them so one side is longer than the other. For example, instead of folding 12″ into two 6″ parts, fold it so that one part is 5.25″ and the other side is 6.75″. When you weave the 4 strips together, let the longer part be on top.Note: both the top and bottom side of the paper strip will be visible in the final star. Thus, you should use paper that is colored on both side. You can also use different color paper strips which make a nice effect.
Note: Traditional Moravian Stars are dipped in melted paraffin and then sprinkled with glitter. This renders the stars water resistant and they can be hung outside during Christmas time. Learn how to thread a string through the star so it can be hung up. |
– see drawn instructions for Moravian star
– buy already made Moravian stars
– buy pre-cut paper for making for Moravian stars
– go to other forms of strip folding
– free origami instructions