Business Card Columbus Cube
If you really want to impress your office friends then try folding your business cards into a Columbus Cube. This piece of fine origami was first published by David Mitchell in his book “Mathematical Origami. The instructions have been modified to work with business cards. You will need 6 business cards and you should have already mastered the art of folding a business card Jackson’s Cube.
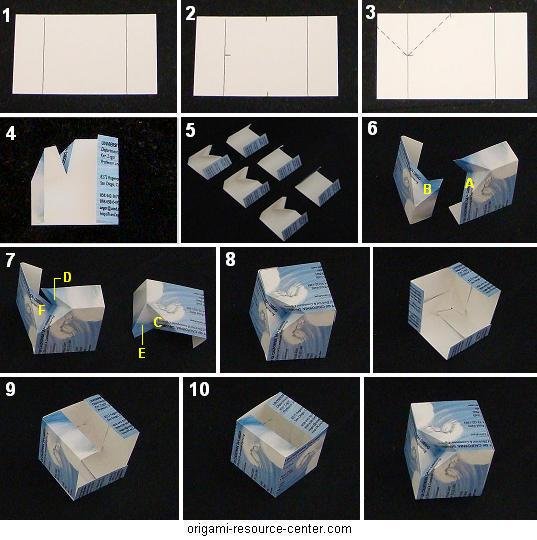
- Take two business cards and stack them perpendicular to one another (as shown here. You can do one of two things:
- This method is easier: use a pencil or a pen to draw the lines as show. You can also use a scoring device to score the business cards instead of drawing lines. A scoring device can be a folding bone, the tip of a knife, or a pen that has no more ink in it.
- Don’t bother with drawing lines – just start folding along the lines right away.
- Within the penciled square, identify and mark the center points. You will need 3 points as landmarks: top point, left point, and bottom point.
- Use a ruler and draw a line connecting the top point to the left point. Use the ruler to connect the bottom & left points then, draw a line that extends from the left point outwards until it reaches the end of the business card.
- Fold along the lines as shown. Folding is easier if you scored the business cards. Make 3 cards in this manner.
- Fold another 3 business cards as if you were making a Jackson’s Cube (see here)
- To assemble the business card Columbus Cube, place two folded cards (made in step 4) so that they are balanced on the flaps as shown. Overlay section A of one card onto section B of second card as shown.
- Take the 3rd folded card (made in step 4) and slide it in place:
place section C over section D and
tuck section E under section F. - This forms a somewhat stable structure because the triangular sections slide one under another. You should see the beginnings of what looks like a cube with one corner chopped off. Turn the model around and continue as if you were assembling a business card Jackson’s Cube.
- Use the 3 remaining folded business cards (made in step 5) to complete the back side of the business card Columbus Cube. Slide a card on the left of the model. Be sure that the flap touches the inner side of the bottom card.
- Slide in a card at the front of the model and another card on top (see Jackson’s Cube instructions if you need more guidance).
- Rotate around and you’re done! This model is semi stable but cannot be tossed around. If you want the model to be more stable, press the folds firmly. The flaps helps hold the pieces together. It should be noted that the Columbus Cube is very stable when made with square sheets of paper.
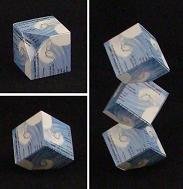 Cool Factor: Because the Columbus Cube has one corner chopped off, you can balance the cube at an angle. An even more fantastic orientation is to balance a number of business card Columbus Cubes one on top of another. You can also assemble the Columbus Cubes into a ring or into a ball as explained in David Mitchell’s book.
—> go back to business card origami page
—> see other types of origami
—> find other free origami instructions
—> go to Site Map


