Origami Balloon Bunny Instructions
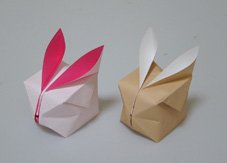
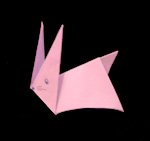
Learn to make an Origami Balloon Bunny which is inflated so it is 3-dimensional and not flat. This model is based on the classic waterbomb base. It is not hard to make and the results are sure to please!
Origami Balloon Bunny Instructions

-
- Make a waterbomb base: start with a square sheet of paper with colored-side facing up. Fold in half (left to right) and unfold. Repeat fold in the vertical direction (top to bottom), unfold.
- Turn the paper over and fold/unfold along diagonals to get an X-shaped crease.
- Collapse the paper by bringing the top-edge of the paper to the bottom-edge of the paper. At the same time, pinch the left and right edges of the paper together.

-
- Completed waterbomb base.

-
- Fold the bottom-left and bottom-right corners of the waterbomb base to the top of the model. It will look like a diamond resting on top of a triangle.
- Fold in the left and right corners of the diamond towards the middle of the model.

-
- At the top of the model are two loose corner-flaps. Fold the corner-flap down so it meets with the edge of the model as shown (join red dots). Unfold. Repeat on the right-side of the model.
- Pry open the layers of paper made in step 6 so you have a pocket (ease open at the red arrows). Repeat on right-side.

-
- Refold the crease made in step 7 and tuck the corner-flap inside the pocket made in step 8. Repeat on right-side.
- Turn the model over.

-
- As in step 5, fold the bottom-left and bottom-right corners of the waterbomb base to the top of the model.
- Mountain fold (fold back) the left and right corners of the diamond.
- Take the corner-flaps at the top of the model and fold them out towards the side. The fold should extend towards the middle of the model but it should not go beyond the blue arrows where the model begins to taper off. These will be the ears of the bunny rabbit.

- Lift the model away for the table and swivel the flaps so the model is more 3D and less flat. Bring the bottom of the model to your lips and inflate it by blowing air into the hole (red arrow). The model should balloon up.
- Pry open the layers of paper at the ears so the white-side of paper is showing.
- Done! The model looks good with the white-side of the paper as the body and the colored side as the ears.
– see photo-instructions
– more Easter Origami
– more origami animals
– free origami instructions
– Home Page
– Site Map


