Clover Whirligig

Clover Whirligig Instructions

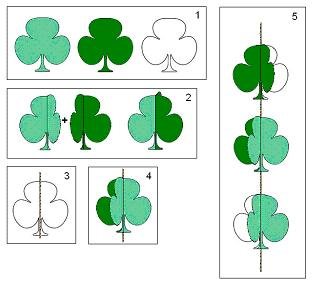
  1. Cut out three shamrock (clover) shapes.
     
  2. Fold two of the clovers in half and glue half of one clover to the half of the second clover.
     
  3. On the third clover, glue on a long string or yarn.
     
  4. Glue the clover made in step 2 to the clover-string made in step 3. After the glue has dried, fold the third clover in half so that all 3 clovers are at the same angle from each other.
     
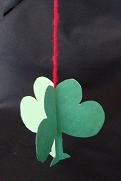
  5. Create a few of these and connect them on the same string. Hang them outside and they’ll spin and swirl!


Clover Whirligig

  •  

    Books with Easy Origami

    • Easy Origami: over 30 simple projects by John Montroll
    • Origami Fun Kit for Beginners by John Montroll
    • My First Origami Kit by Joel Stern
    • Easy Origami: A Step-by-Step Guide for Kids by C Alexander & M Meinking
    • Fun With Easy Origami (Dover Origami Papercraft)
    • Origami: A Step-by-Step Introduction to the Art of Paper Folding by T Cook & S Henry
    • Easy Origami For Kids Book Traditional Japanese Folding Papers Overs 20 Projects by J Wish
    • Easy Origami for Kids: Over 40 Simple Origami Projects by O Brooks


    Easy Origami Books

  •  
     

    Please Help

    Please help by reporting broken links so that we can fix them. One easy message from you can save us hours and hours of clicking. Thanks!

  •  

    More Origami Diagrams and Instructions…

  • These free origami instructions are made available to you by the paper folding community at large. If you have a diagram you would like to share, or if your diagram is listed here and you wish to have it removed, please Contact Us. Diagrams are intended for personal use. Copyright of the models lie with the origami creators and designers. Please contact the designer and/or creator directly for non-private usage of a model and/or artwork.